14. Active Form
The Yii Active Form functionality makes managing forms a snap, complete with client side validation.
In GridView, let's click on the pencil for a record. Or, click the open eye, then click the Update button. Either way, you end up with a page that looks like the following:
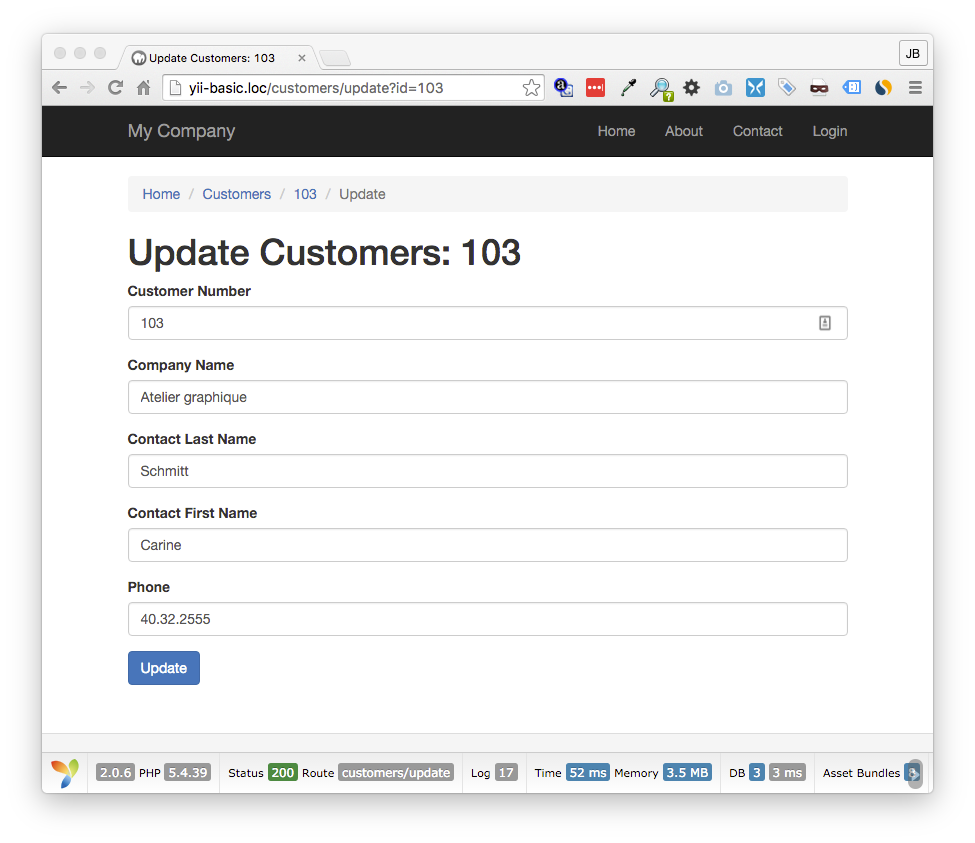
This form has been completely auto-generated just as you see. You will notice that labels are provided for each input field and each field is filled in with the current data for that record.
However, there is one easy trick that improves this form. All these fields are set as required in the model rules. If you try to submit this form with a field empty, you would get an error. That being the case, it would be nice, and is standard procedure, to put a red asterisk next to each field label for all required fields. As it turns out, this is very easy to do. Actually, the form generated above already has a class called 'required' assigned to each required field. To make a red asterisk appear, simply add the following to the CSS file: /web/css/site.css
div.required label:after {
    content: " *";
    color: #e13431;
}
Once added, the form will now look like this, with no further alteration:
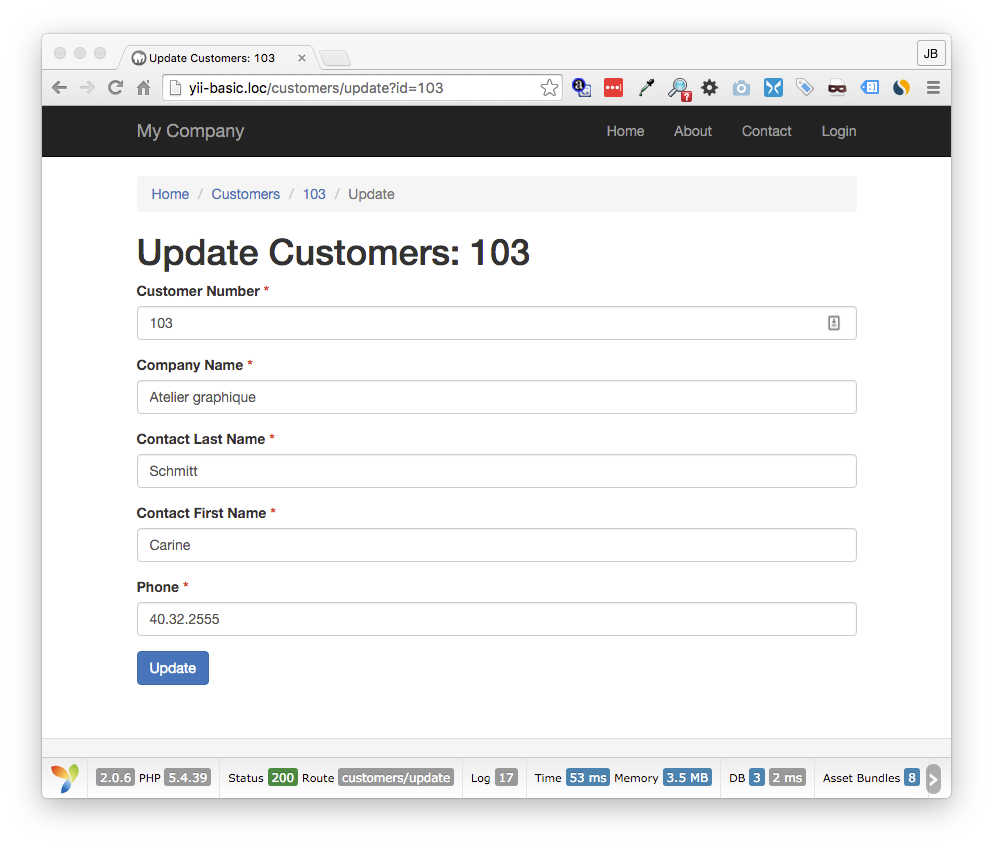
Notice the red asterisk next to each field label. Like magic!
14.1 The Active Form Code
Take a moment and refer back to section 10.1.2 where we used Gii to generate the CRUD function. Remember that along with the models, there were a number of view files. One of these files was /views/customers/_form.php. That is the file containing the generated form we see here.
The nice thing about this arrangement is that the same _form.php file is used for updating a record or creating a new record. In both the /views/customers/update.php file and the /views/customers/create.php file you will see the following code:
   <?= $this->render('_form', [
        'model' => $model,
    ]) ?>
The interesting thing about this code is that you are calling a view from within another view, which is, obviously, entirely valid. This calls the same form for creating a new record as updating a current record.
And, following, is the code for the form:
<?php

use yii\helpers\Html;
use yii\widgets\ActiveForm;

?>

<div class="customers-form">

    <?php $form = ActiveForm::begin(); ?>

    <?= $form->field($model, 'customerNumber')->textInput() ?>

    <?= $form->field($model, 'companyName')->textInput(['maxlength' => true]) ?>

    <?= $form->field($model, 'contactLastName')->textInput(['maxlength' => true]) ?>

    <?= $form->field($model, 'contactFirstName')->textInput(['maxlength' => true]) ?>

    <?= $form->field($model, 'phone')->textInput(['maxlength' => true]) ?>

    <div class="form-group">
        <?= Html::submitButton($model->isNewRecord ? 'Create' : 'Update', ['class' => $model->isNewRecord ? 'btn btn-success' : 'btn btn-primary']) ?>
    </div>

    <?php ActiveForm::end(); ?>

</div>
And that is it! Just this code generates the entire form.
14.2 The Resulting HTML From Code
Here is the HTML that this code snippet generates:
<div class="customers-form">

    <form id="w0" action="/customers/update?id=103" method="post">
        <input type="hidden" name="_csrf" value="cXJEWk41OGgZCggxKn5xJh8YJ2g4AXklFCAUFTcFSTswFWkvP0F.Aw==">
        <div class="form-group field-customers-customernumber required">
            <label class="control-label" for="customers-customernumber">Customer Number</label>
            <input type="text" id="customers-customernumber" class="form-control" name="Customers[customerNumber]" value="103">

            <div class="help-block"></div>
        </div>
        <div class="form-group field-customers-companyname required">
            <label class="control-label" for="customers-companyname">Company Name</label>
            <input type="text" id="customers-companyname" class="form-control" name="Customers[companyName]" value="Atelier graphique" maxlength="50">

            <div class="help-block"></div>
        </div>
        <div class="form-group field-customers-contactlastname required">
            <label class="control-label" for="customers-contactlastname">Contact Last Name</label>
            <input type="text" id="customers-contactlastname" class="form-control" name="Customers[contactLastName]" value="Schmitt" maxlength="50">

            <div class="help-block"></div>
        </div>
        <div class="form-group field-customers-contactfirstname required">
            <label class="control-label" for="customers-contactfirstname">Contact First Name</label>
            <input type="text" id="customers-contactfirstname" class="form-control" name="Customers[contactFirstName]" value="Carine " maxlength="50">

            <div class="help-block"></div>
        </div>
        <div class="form-group field-customers-phone required">
            <label class="control-label" for="customers-phone">Phone</label>
            <input type="text" id="customers-phone" class="form-control" name="Customers[phone]" value="40.32.2555" maxlength="50">

            <div class="help-block"></div>
        </div>
        <div class="form-group">
            <button type="submit" class="btn btn-primary">Update</button>    </div>

    </form>
</div>
14.3 Initialize Active Form
The code
$form = ActiveForm::begin();
initializes the form, assigns the ActiveForm object to the
variable $form and creates the opening form tag. In this case the tag generated is:
<form id="w0" action="/customers/update?id=103" method="post">
The form is closed out by firing the
ActiveForm::end();
method. This creates the closing form tag.
Configuration parameters to control the form can be passed as an array to the
ActiveForm::begin()
method.
14.3.1 Setting the Form Action Value
The default form action is to submit the form back to the same page. Thus, the page that we are viewing is customers/update?id=103 and that is the value for the form action.
To have the form submit to a different page, you would pass the url in as part of the config array. So, say we wanted instead to submit to the url some-controller/some-action and have id 101 as a GET parameter. You would pass this as the value for the 'action' key in the array. Your method would look like this:
<?php $form = ActiveForm::begin([
    'action' => ['some-controller/some-action','id' => '101']
]); ?>
14.3.2 Setting the Form ID
Perhaps you would like to change the form id from what is auto-generated (in this case it is 'w0') to something specific, like ' login-form'. You would simply set this as the value for the 'id' key in the config array. Adding this to the action config above, you would have the following:
<?php $form = ActiveForm::begin([
'action' => ['some-controller/some-action','id' => '101'],
'id' => 'login-form',
]); ?>
14.3.3 Setting the Form Submission Method
By default, your forms will be set to use the POST method when using Active Form. You can change this default by passing a value to the 'method' key. Adding to the config above, if you wanted to change the method to GET, you would do so as such:
<?php $form = ActiveForm::begin([
	'action' => ['some-controller/some-action','id' => '101'],
	'id' => 'login-form',
	'method' => 'get'
]); ?>
14.3.4 Other Form Tag Attributes
The final key in the config array is 'options'. You can put any additional tag attributes as key/value pairs as an array assigned to the 'options' key. If you wanted to specify a css class to use for this form, you would add that to the options array. Adding to the config above, if you wanted to set the class to 'form-class-1', your final code would be as follows:
<?php $form = ActiveForm::begin([
	'action' => ['some-controller/some-action','id' => '101'],
	'id' => 'login-form',
	'method' => 'get',
	'options' => ['class' => 'form-class-1']
]); ?>
14.4 Active Form Fields
Yii supports all HTML form controls. These are referred to as Active Fields. A lot of the work is taken care of. This includes form validation on each field. If the form is submitted with invalid or missing data, the valid fields that are filled in will persist. If updating records, the current value of the field is used to generate the form field.
14.4.1 Text Input Field
The basic code to create a simple text input form field is as follows:
<?php echo $form->field($model, 'field_name')->textInput() ?>
The $form variable holds the Active Form object created with the begin() method.
The field() method accepts two values. The first specifies the model associated with the data being entered on this form. The second value is the name of the form field, which will match the field name in the model.
The final method in the chain is textInput, which does the actual creation of the text input field. A config array can be passed to this method specifying various attributes.
Notice that we are echoing out the return value from the method. The shorthand method is actually more common, being equivalent to the following:
<?= $form->field($model, 'field_name')->textInput() ?>
14.4.1.1 Specify Text Input Field Attributes
The most common attribute you will specify for a text input field is maxlength which limits the number of characters that can be entered into the field. Setting a maxlength of 50 characters would be done as follows:
<?= $form->field($model, 'field_name')->textInput(['maxlength' => 50]) ?>
You may have noticed in the Gii generated form for the text input fields, the attribute pass was
['maxlength' => true]
. Remember the model rules? The
rules allow you to set a maximum character length for a string. By setting maxlength to true, it simply enforces what is set in the rule for maximum string
length. You can verify this above by viewing the input fields generated in section 14.2.
Another common attribute for at text input field is to set a placeholder. This is the greyed out text you sometimes see in a text field that disappears when you begin typing in the field. Here is an example:

Adding a placeholder is as simple as the following:
<?= $form->field($model, 'companyName')->textInput(['maxlength' => true, 'placeholder' => 'Enter Company Name']) ?>
14.4.2 Text Area
Rendering a text area is simple and text entered will persist if the page is reloaded due to validation errors.
<?= $form->field($model, 'description')->textarea(['rows' => 4]) ?>
This will create a text area with 'description' as the field name and having 4 rows.
14.4.3 Dropdown List
Yii active form solves a lot of the challenges with managing a dropdown list. The list options are generated with a simple array of key/value pairs. And, again, if a option is selected, that option remains selected if the page is reloaded due to validation errors.
Here is an example:
<?php
$items = [
'key1' => 'Option 1',
'key2' => 'Option 2',
'key3' => 'Option 3'
];
echo $form->field($model, 'options')->dropDownList($items);
?>
First we create an array of options. Then we pass that array to the dropDownList method.
This code will result in the following HTML:
<select id="customers-options" class="form-control" name="Customers[options]">
<option value="key1">Option 1</option>
<option value="key2">Option 2</option>
<option value="key3">Option 3</option>
</select>
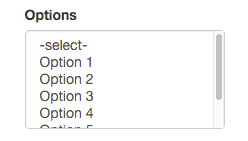
As listed above, the dropdown would have 'Option 1' as the default. However, many times you want to have a prompt displayed as default instead, such as 'select'. The following alteration will accomplish just that:
echo $form->field($model, 'options')->dropDownList(
	$items,
	['prompt' => '-select-']
);
We can also set a specific element ID for this dropdown. Let's see we want to set the id to be 'field-id'. You would add it as so:
echo $form->field($model, 'options')->dropDownList(
	$items,
	[
		'prompt' => '-select-',
		'id'=> 'field-id',
	]
);
14.4.3.1 Multi Select List Box
To expand further, perhaps we want to have the dropdown displayed as a multi select list box and set the width to 200 pixels. We want the selection box to show 5 options for selection. This would be the code:
echo $form->field($model, 'phone')->dropDownList(
	$options,
	[
		'prompt' => '-select-',
		'multiple' => true,
		'id'=> 'field-id',
		'style' => 'width:200px;',
		'size' => 5
	]
);
The result would look like this:
14.4.3.2 Option Grouping
We can also group our options in the dropdown list with the optgroup tag. To perform grouping, simply alter the $items array. The key will be the group name. The following example will group the options into Group 1 and Group 2:
$items = [
	'Group 1' => [
		'key1' => 'Option 1',
		'key2' => 'Option 2',
		'key3' => 'Option 3',
		],
	'Group 2' => [
		'key4' => 'Option 4',
		'key5' => 'Option 5',
		'key6' => 'Option 6',
	]
];

echo $form->field($model, 'options')->dropDownList(
	$items,
	[
		'multiple' => true,
		'id'=> 'field-id',
		'style' => 'width:200px;',
		'size' => 8,
	]
);
The result would appear as such:

14.4.4 ListBox
The listBox method accomplishes basically the same thing as the dropDownList setting 'multiple' to true. The following code will produce the same result as the dropDownList shown in section 14.4.3.2:
echo $form->field($model, 'options')->listBox(
	$items,
	[
		'style' => 'width:200px;',
		'size' => 8,
	]
);
14.4.5 Checkbox
The code to create a form checkbox is as follows:
<?= $form->field($model, 'optin')->checkbox() ?>
The checkbox method can take two parameters. The first is an array of options and the second is a boolean specifying whether to enclose the checkbox with the label template, defaults to true.
There are two attributes for the options array that you should be aware of. The first is the 'label' attribute. This allows you to specify a label for the checkbox that will be printed to the right of the checkbox. The default is to use the standard label for that attribute of that model. This would be set as such:
<?= $form->field($model, 'optin')->checkbox(['label' => 'My Label']) ?>
The second option array attribute to be aware of is a little tricky. Be default, when you use the checkbox method, along with the checkbox, a hidden form field will be included. This field will have the same name as the checkbox field and by default will be assigned the value of zero. Thus, if the form is submitted without the checkbox checked, there will still be a submission for that field. Again, zero by default.
The value associated with the unchecked state of the checkbox is set by passing a value for the array key of 'uncheck'. Thus, if you want the unchecked state to pass the number 123 when the form is submitted with the checkbox not checked, you would do so like this:
<?php echo $form->field($model, 'phone')->checkbox([
	'label' => 'My Label',
	'uncheck' => '123'
]) ?>
If you want to disable this behavior entirely, you must pass 'null' for the value of the 'uncheck' attribute, as such:
<?php echo $form->field($model, 'phone')->checkbox([
	'label' => 'My Label',
	'uncheck' => null
]) ?>
14.4.6 Radio Buttons
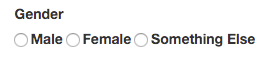
Lists of radio buttons can easily be created and managed with Active Form. The button that is checked will be preserved if the page is reloaded due to validation error. Let's see we want to create a list of radio buttons that would look like this in HTML:
<input type="radio" name="gender" value="male"> Male<br>
<input type="radio" name="gender" value="female"> Female<br>
<input type="radio" name="gender" value="other"> Something Else
First, we would create an array of key/value pairs to specify the form input values and the labels for each.
<?php
$radio_ary = [
	'male' => 'Male',
	'female' => 'Female',
	'other' => 'Something Else'
]
?>
Then we would call the radioList Active Form method and pass that array as the first parameter, as such:
<?= $form->field($model, 'gender')->radioList($radio_ary) ?>
The second optional parameter that can be passed to the radioList method is an options array.
The result appears as such:
As with the checkbox, a hidden form field will be generated with the same field name so that there can be something submitted as default when no box is checked. By default, the value of this field is empty.
If you want to disable this behavior, you would set the 'unselect' value of the array to null.
<?= $form->field($model, 'gender')->radioList($radio_ary,['unselect' => null]) ?>
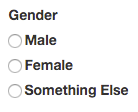
As for displaying radio button groups, the default behavior is to display the buttons in a horizontal line as shown above. Here is a simple trick to stack them vertically instead.
The options array has an attribute named 'separator'. This allows you to pass any string and it will be used to separate the radio buttons. If you pass the string '<br>', your buttons will then stack vertically rather than horizontally. Here is how the code would look:
<?= $form->field($model, 'gender')->radioList($radio_ary,[
	'unselect' => null,
	'separator' => '<br>'
]) ?>
This code would produce the following:
14.4.7 Checkbox List
Radio button allow a selection of only one option. In the example above, you would select either Male, Female or Something Else. You could not select more than one at a time.
The Checkbox List is similar to the radioList but instead of creating radio buttons, it creates a list of checkboxes. This allows the selection of more than one.
The following code would produce a list of three checkboxes:
<?= $form->field($model, 'items[]')->checkboxList(
	[
		'a' => 'Item A',
		'b' => 'Item B',
		'c' => 'Item C'
	]
); ?>
The result will appear as follows:
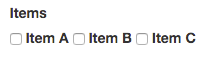
This code will submit an array of items using the attribute name, rather than just one value for the attribute.
As shown, the first parameter to pass to this method is the array of key/value pairs to construct the checkbox list. The optional second parameter that can be passed is the options array.
The options are similar to the radio list options. You can set the unselect string to be submitted if no box is checked and you can pass a separator to display the list differently.
The following code would display this same checkbox list vertically instead of horizontally:
<?= $form->field($model, 'items[]')->checkboxList(
	[
		'a' => 'Item A',
		'b' => 'Item B',
		'c' => 'Item C'
	],
	['separator' => '<br>']
); ?>
14.4.8 Password Field
To create a password field which blanks out the characters as they are typed, all that is need is the following code:
<?= $form->field($model, 'password')->passwordInput() ?>
As usual, the passwordInput input method accepts an options array. If you wanted to specify a specific ID for this form field, you would pass that as an array as such:
<?= $form->field($model, 'password')->passwordInput(['id' => 'password-field']) ?>
14.4.9 Hidden Field
It is not necessary to use Active Form for hidden form fields as there is generally no validation, labels or formatting. The following code will create a hidden field for the attribute 'hidden_field':
<?= Html::activeHiddenInput($model, 'hidden_field'); ?>
You may ask, 'how is the value for the hidden field set'?
The answer is, whatever the value for that attribute in that model is, this will be set as the hidden field value. If this form is to update a record, the current field value for that record will be set as the value for the hidden field.
If you want to specifically set a value, you would assign that value to the model attribute in the controller. So, if you wanted to set the value to 'test123', you would see this in the controller that calls that form view:
$model = new Customers();

$model->hidden_field = 'test123';

return $this->render('create', [
    'model' => $model,
]);
14.4.10 Submit Button
The code to create a simple submit button for the form with the label 'Create' would be as follows:
<?= Html::submitButton('Create', ['class'=> 'btn btn-primary']) ?>
This leverages the Bootstrap CSS framework. The class being 'btn btn-primary' results in the submit button looking like this:

14.4.11 HTML 5 Fields
HTML 5 fields can come in very handy at times and are fully supported by Active Form. There are a number of HTML 5 form fields in the spec, but not all browsers support all field types. Internet Explorer supports the least.
However, there are a couple that are commonly supported that you may find of use, especially if you are creating an application for a mobile or touch screen device.
14.4.11.1 Email Input Field
If you require a user to input their email address on a mobile device, you may want to use this HTML 5 field as it will pull up a special keyboard that facilitates entering an email address:
<?= $form->field($model, 'email')->input('email') ?>
14.4.11.2 Number Input Field
The number input field will only allow numbers to by typed into the field and will pull up the number keypad on a mobile device:
<?= $form->field($model, 'number_field')->input('number') ?>
The field will also show an up/down arrow that allows the user to scroll through numbers when displayed on a desktop.
1.4.11.3 Range
A nifty HTML 5 field type that is fairly widely supported is the range. When setting a field to this type, the field turns into a slider. It appears as such:
14.4.11.4 Min Max
For number fields and range fields, you can set the minimum and maximum numbers. This allows you to set the possible range on the number slider.
<?= $form->field($model, 'number_field')->input('range', ['min' => 50, 'max' => 100]) ?>
14.5 Extra Controls
Additional methods can be added on to further control the look of the form fields.
14.5.1 Form Field Label
As covered in sections 12.4.1 and 12.4.2 regarding the GridView, labels for the fields can be auto generated based on the attribute name, or they can be specified in the attributeLabels method of the model file.
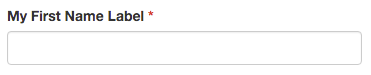
However, if you would like to override the default label for a field, you can do so by adding the label method as such:
<?= $form->field($model, 'contactFirstName')->textInput()->label('My First Name Label') ?>
This would result in the following output:
14.5.2 Form Field Hint
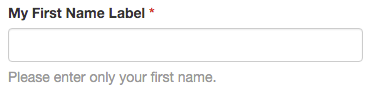
Perhaps you need to add some clarifying info as to how to fill out a certain field. You can use the hint method to add explanatory details:
<?= $form->field($model, 'contactFirstName')->textInput()->label('My First Name Label')->hint('Please enter only your first name.') ?>
The field would now appear as such:
14.5.3 isNewRecord
Active Form has a handy property that can be accessed in the form that will be Boolean true if the record is new. This is useful when using the same form to create new records as updating existing records.
The property is:
$model->isNewRecord
For example, notice the code to display the submit button for the form generated by Gii:
			<?= Html::submitButton($model->isNewRecord ? 'Create' : 'Update', ['class' => $model->isNewRecord ? 'btn btn-success' : 'btn btn-primary'])
			?>
This code will use the label Create for the update button if it is a new record and Update if it is updating an existing record.
14.6 Form Validation Feedback
One of the nicest features built into Yii Active Form is the validation feedback. Let's submit a test form and see the validation results.
This is the submitted form:
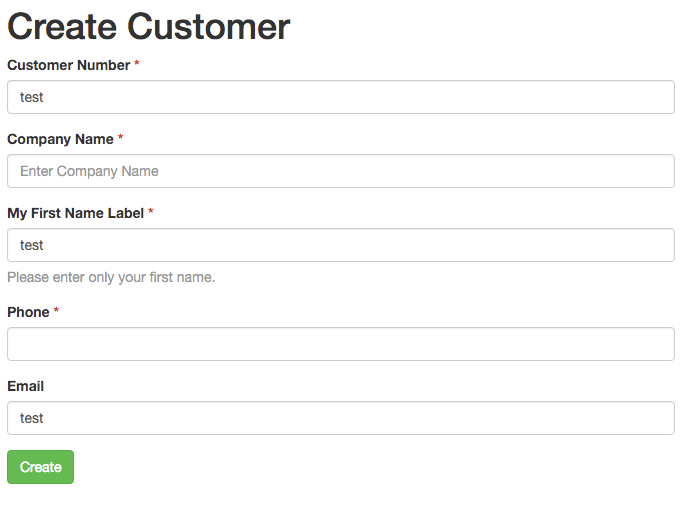
There are some errors with this submission. According to the model rules, the Customer Number must be an integer. The Company Name, First Name and Phone are required. The first name must be at least 10 characters long. And the Email field must contain a valid email address.
Here is the response when submitting this form:
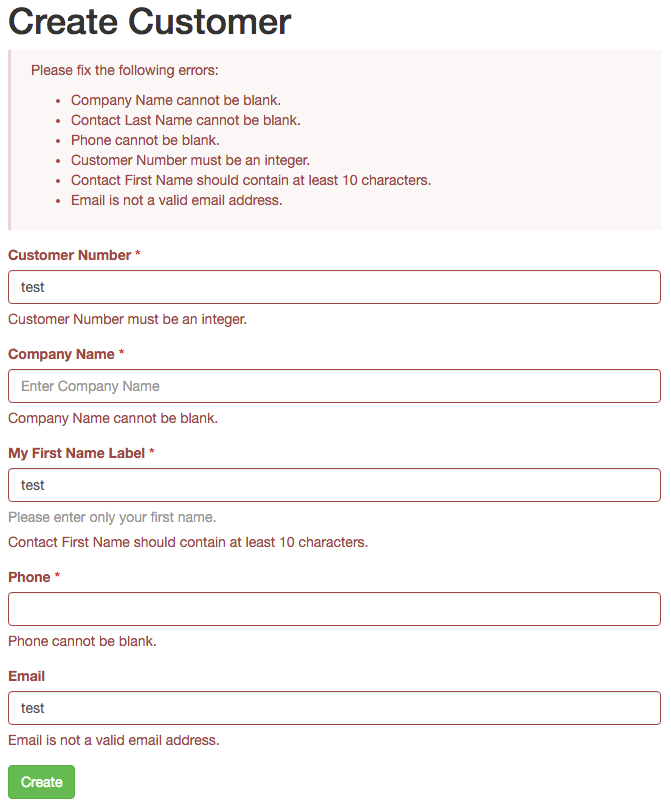
Notice each invalid field is in red and has an error message associated with it specifying why that field submission is not valid.
You will also notice an error summary at the top of the page. This is a nice feature of the validation, however, this error summary is not automatically generated when you generate your form using Gii. You must put the following code into the form view file after ActiveForm::begin.
<?php $form = ActiveForm::begin(); ?>
<?= $form->errorSummary($model); ?>